I-Series Bundle Setup Guide
Written By Mark Hardwick
Last updated Over 1 year ago
Congratulations on receiving your new equipment. This Quick Start Guide will assist you with self-installing the Elo I-Series for Android Hardware Bundle and registering the device with your account.
Before You Start
Before setting up your new equipment, ensure that your site meets the Network and Infrastructure Requirements. You will need a power source conveniently located near the desired location, plus a fast and reliable Internet connection. For additional information, contact your Account Specialist.
Hardware Bundle Contents
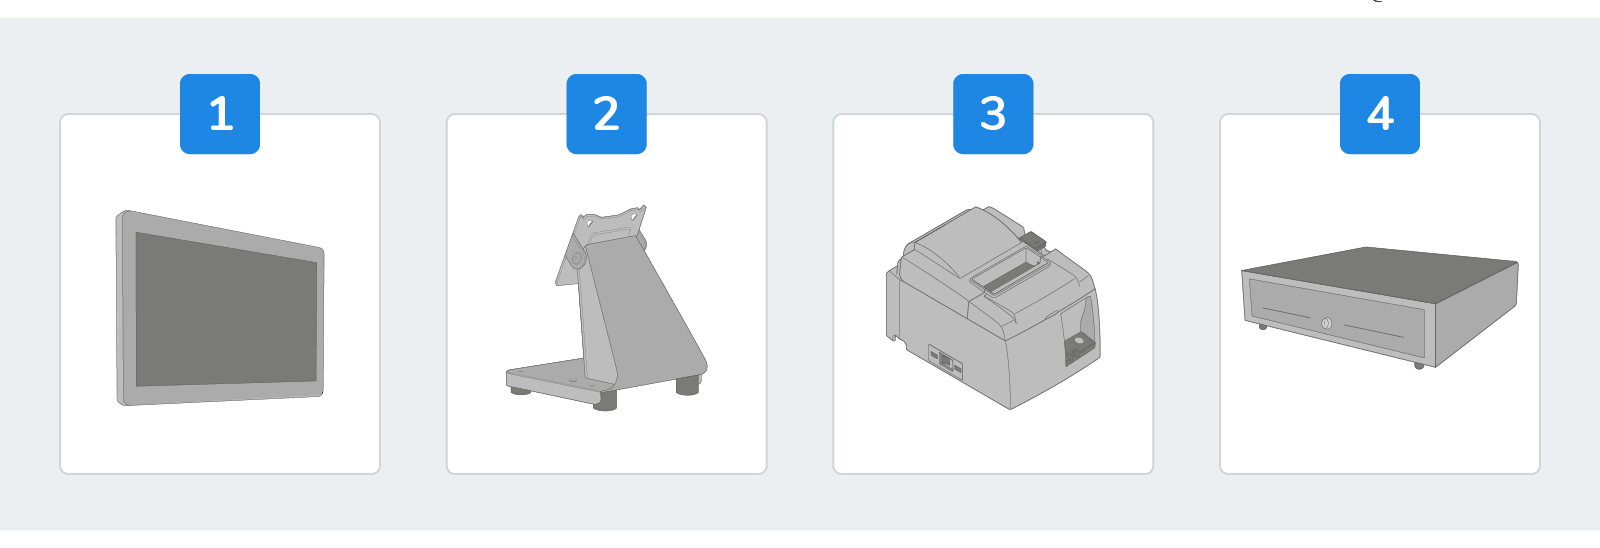
The Elo I-Series for Android Bundle includes the following:
Elo 15.6" I-Series for Android Display
Elo Flip Mount for I-Series Display
Star Micronics TSP143iiiU USB Thermal Receipt Printer
Star Micronics CD3-Series 16" Full-size Cash Drawer
Hardware Setup
Step 1: Set Up the Stand & Display
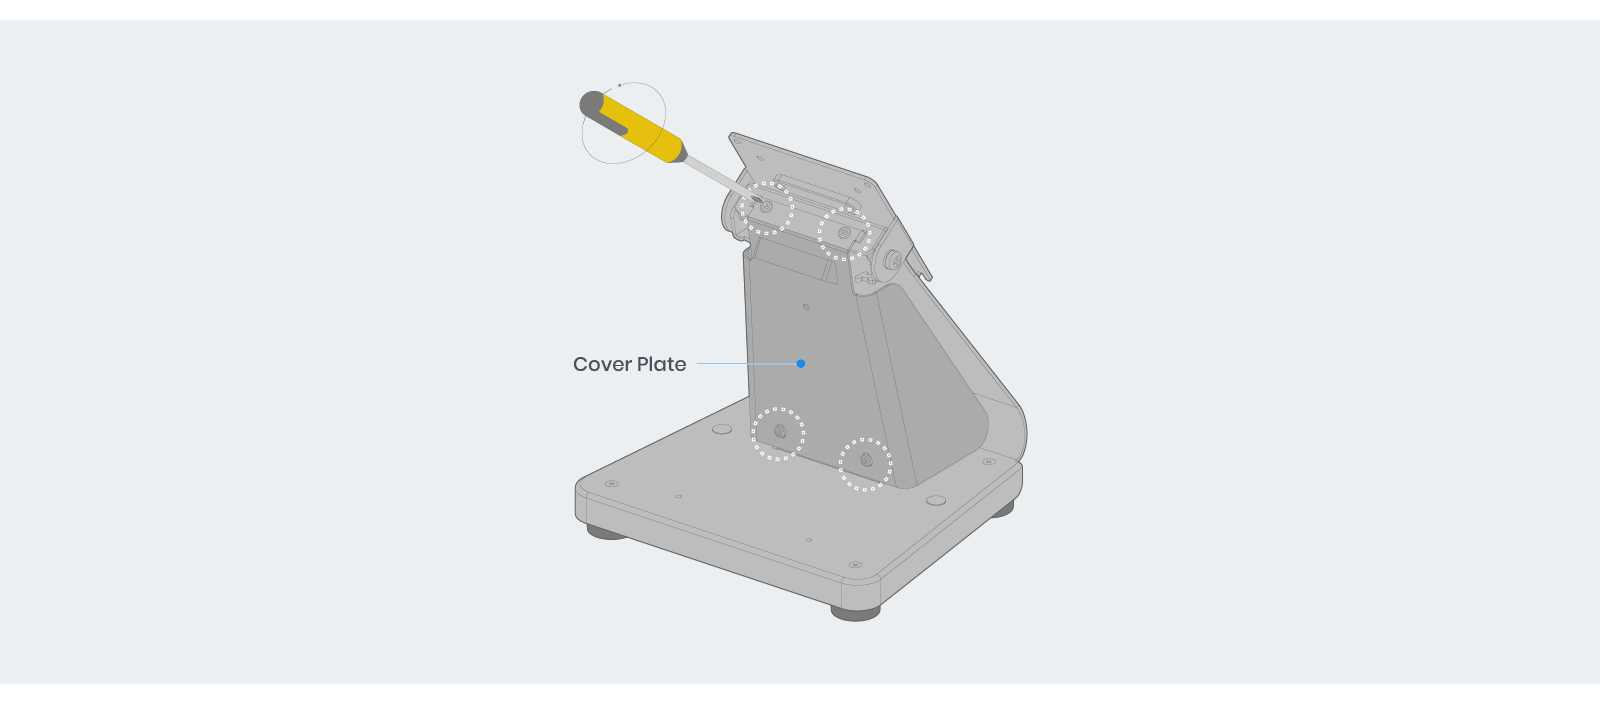
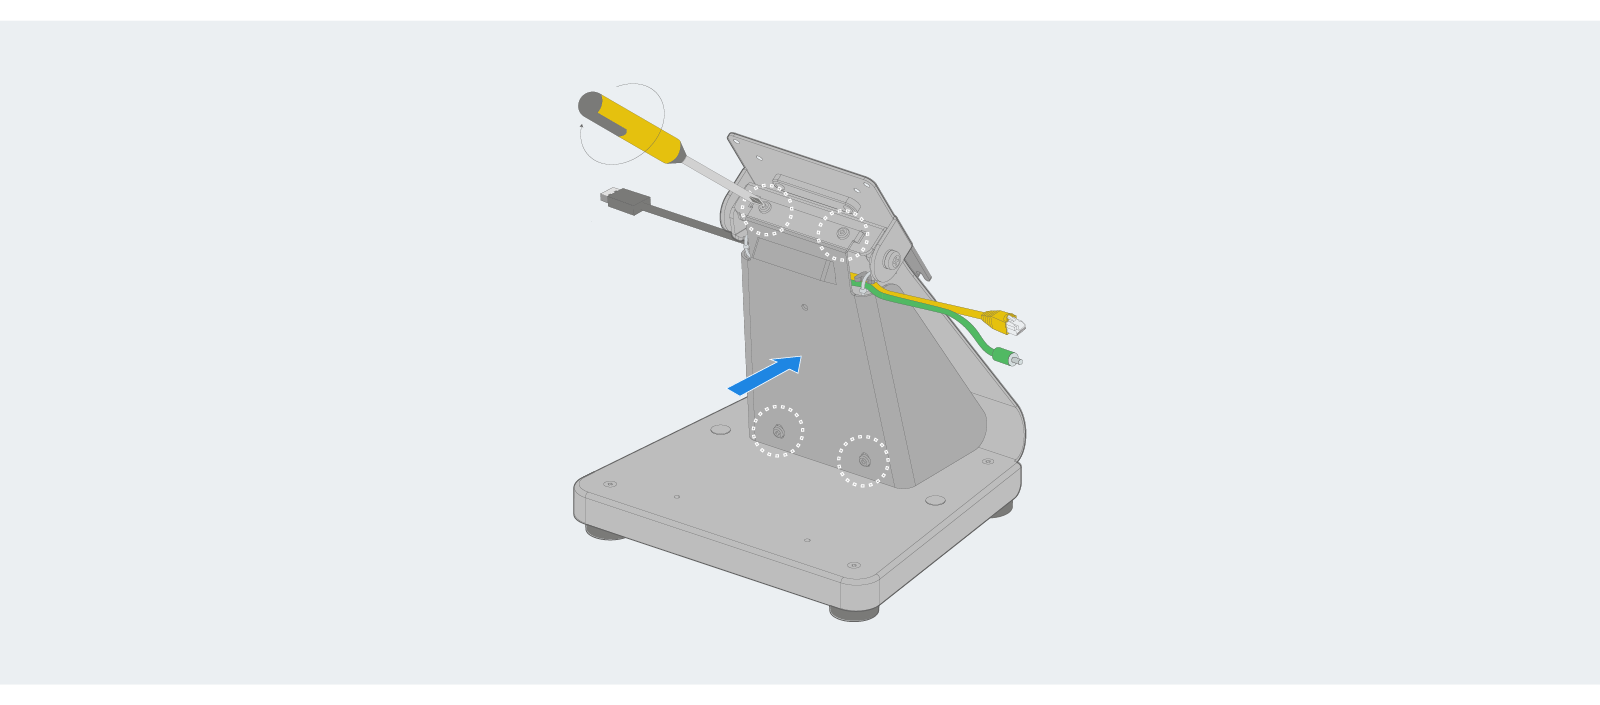
Rotate the display mount and remove the four screws and cover plate from the stand.
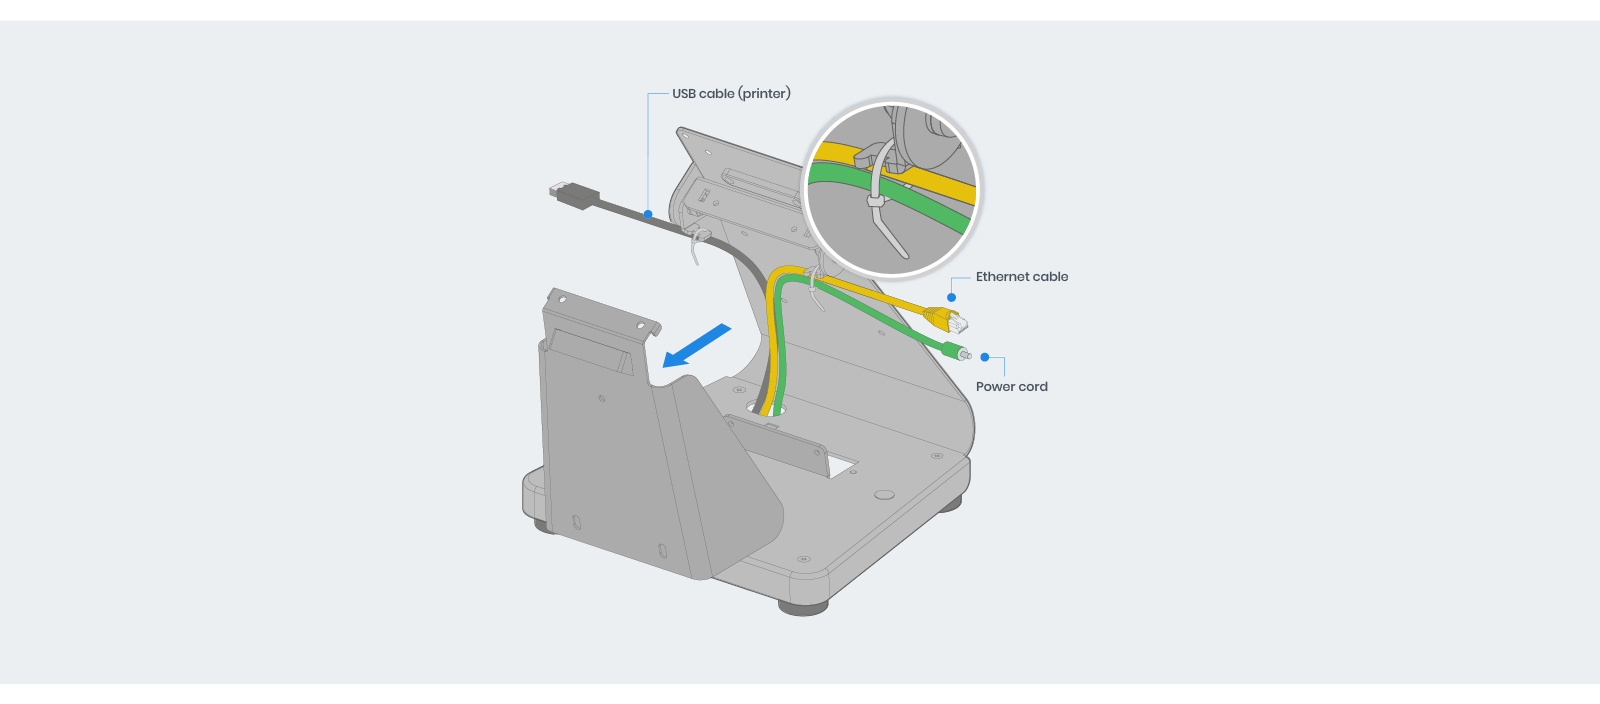
Run the cables through the hole in the base of the stand as shown and secure them to the cord hooks with a cable tie (optional but recommended).
Reattach the cover plate and secure it with the four screws.
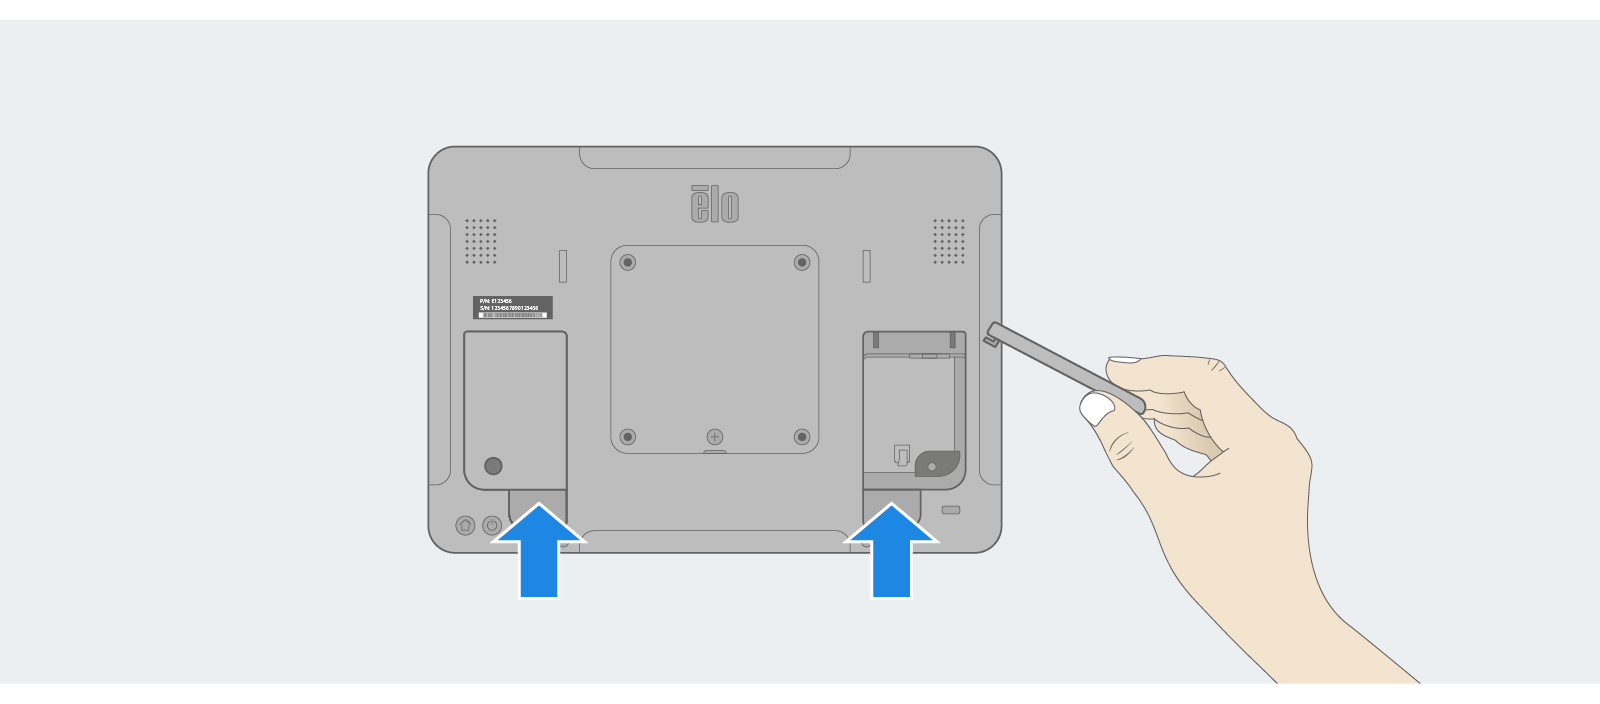
Remove the cover plates on the back of the display by lifting them upward. Note: the packet of screws under the cover will secure the plates back on.
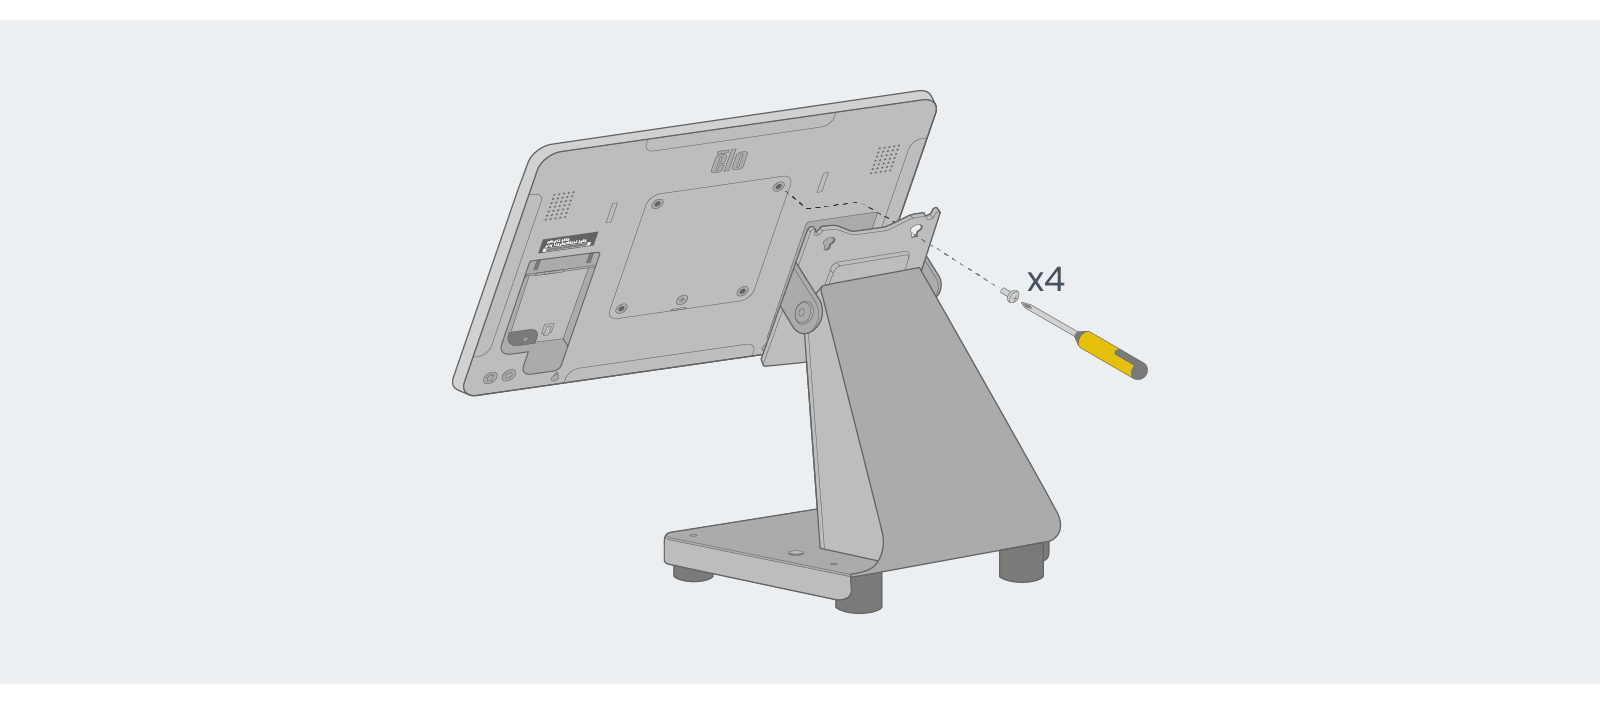
Mount the display to the flip stand using the screws provided.
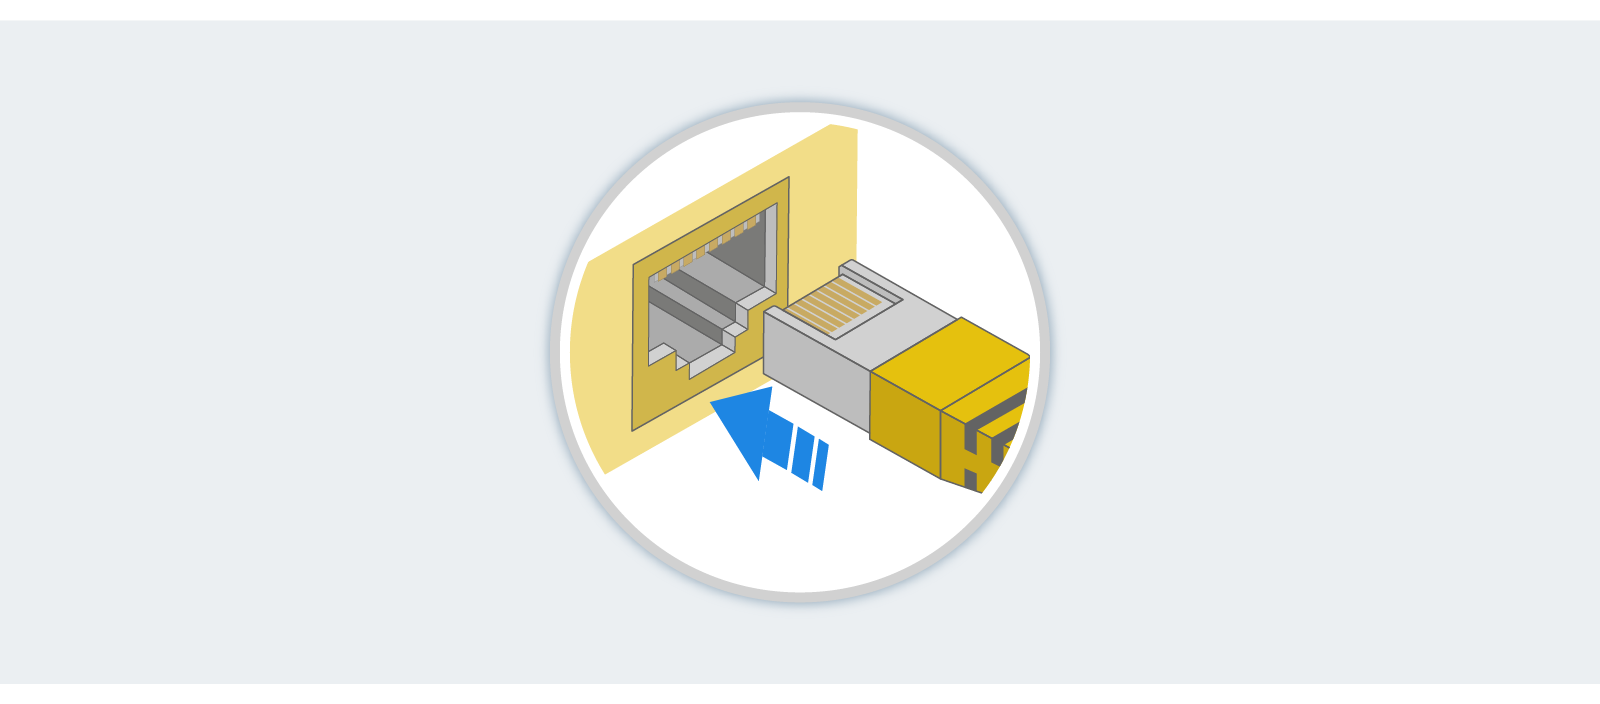
With the display securely mounted, connect the ethernet cable to the ethernet port (if using a hardwired connection).
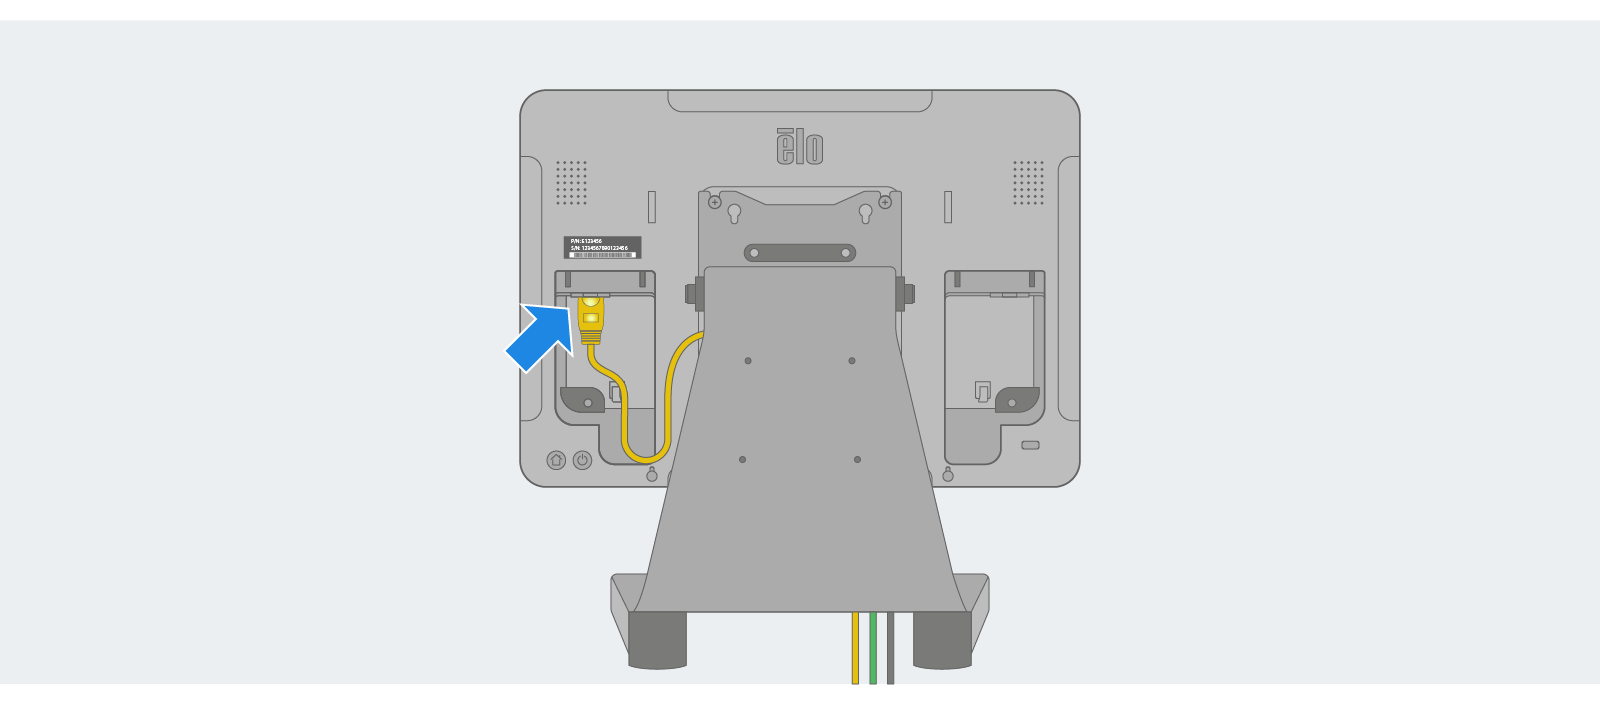
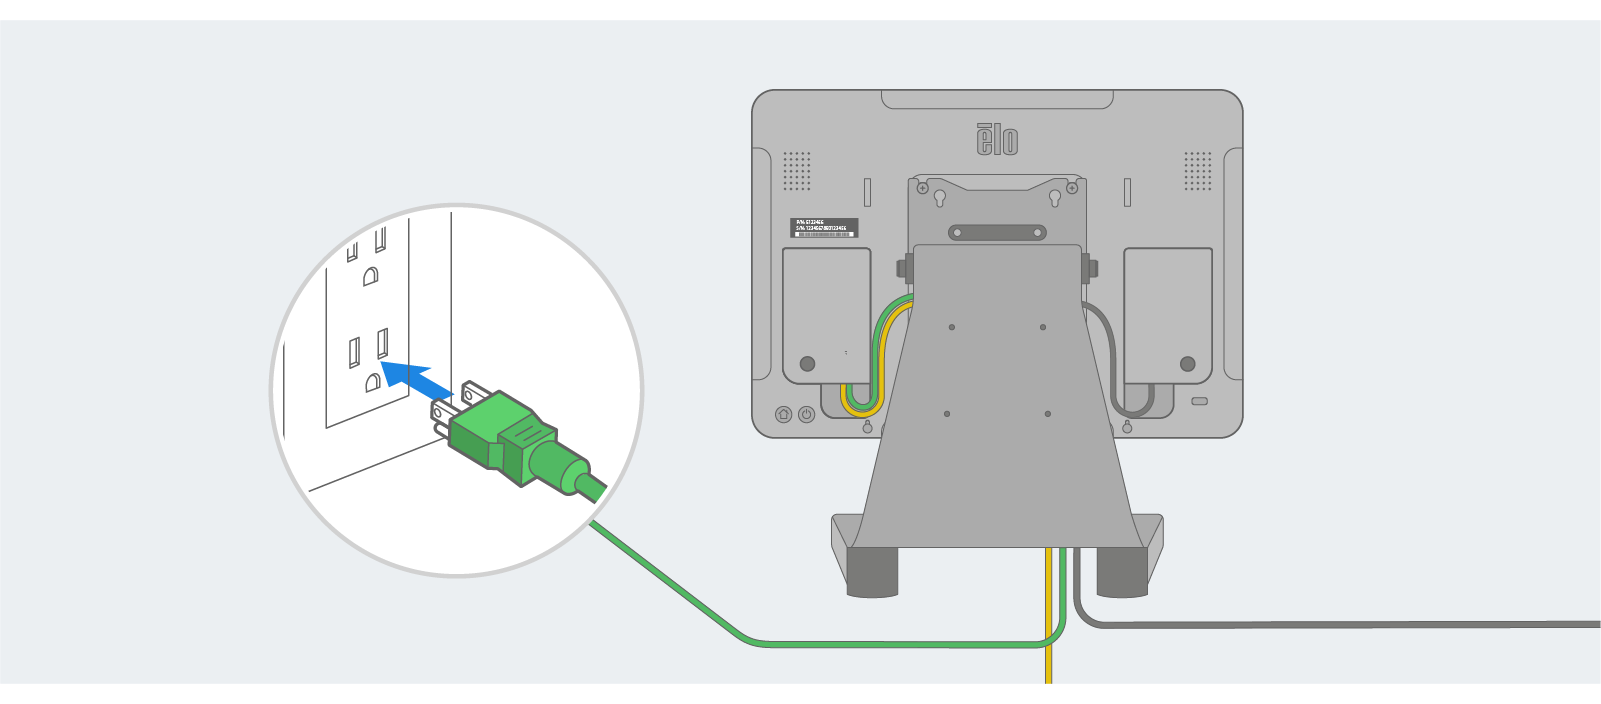
Connect the power cable to the port on the back of the device. Note: Do not plug the power cord into the wall outlet, as the device should remain off.
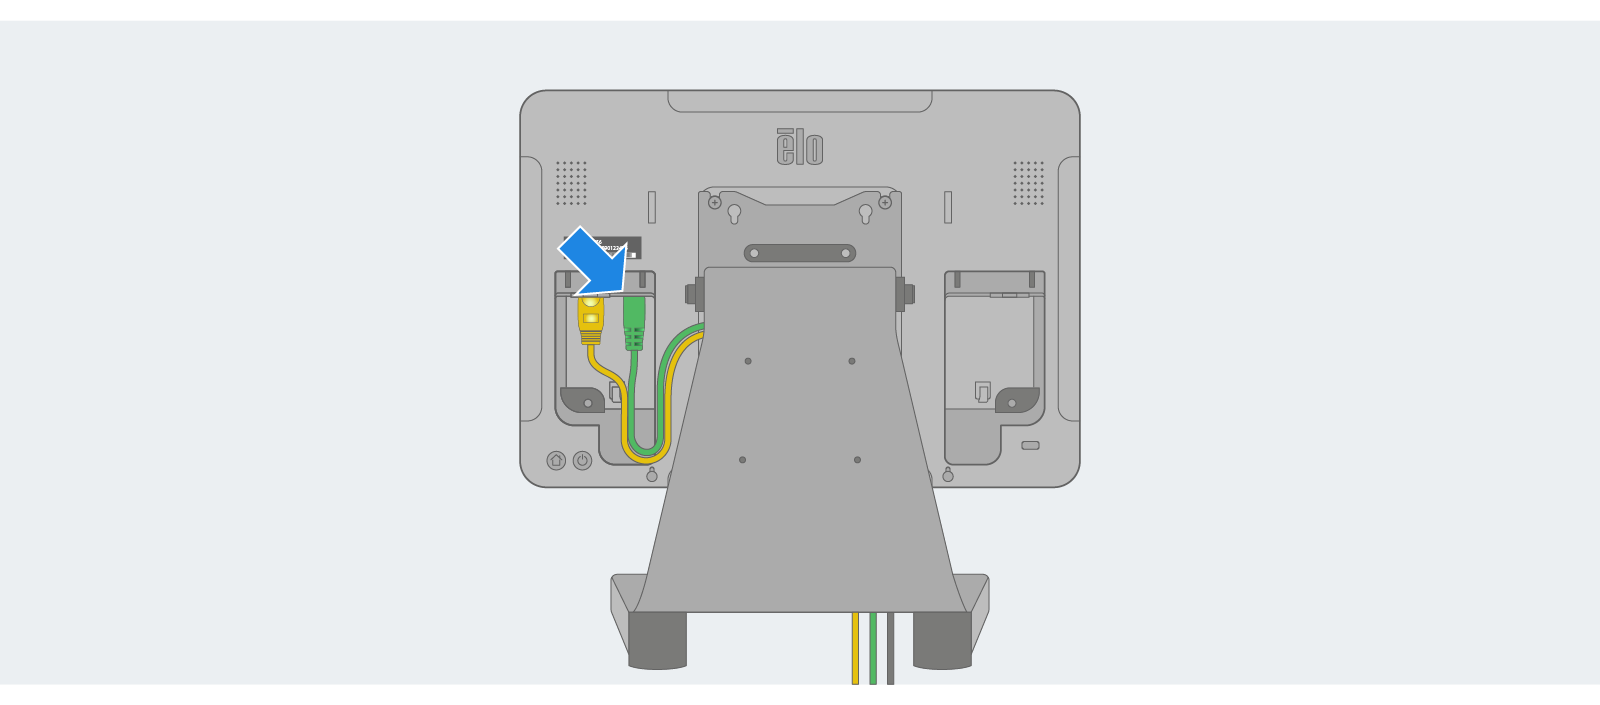
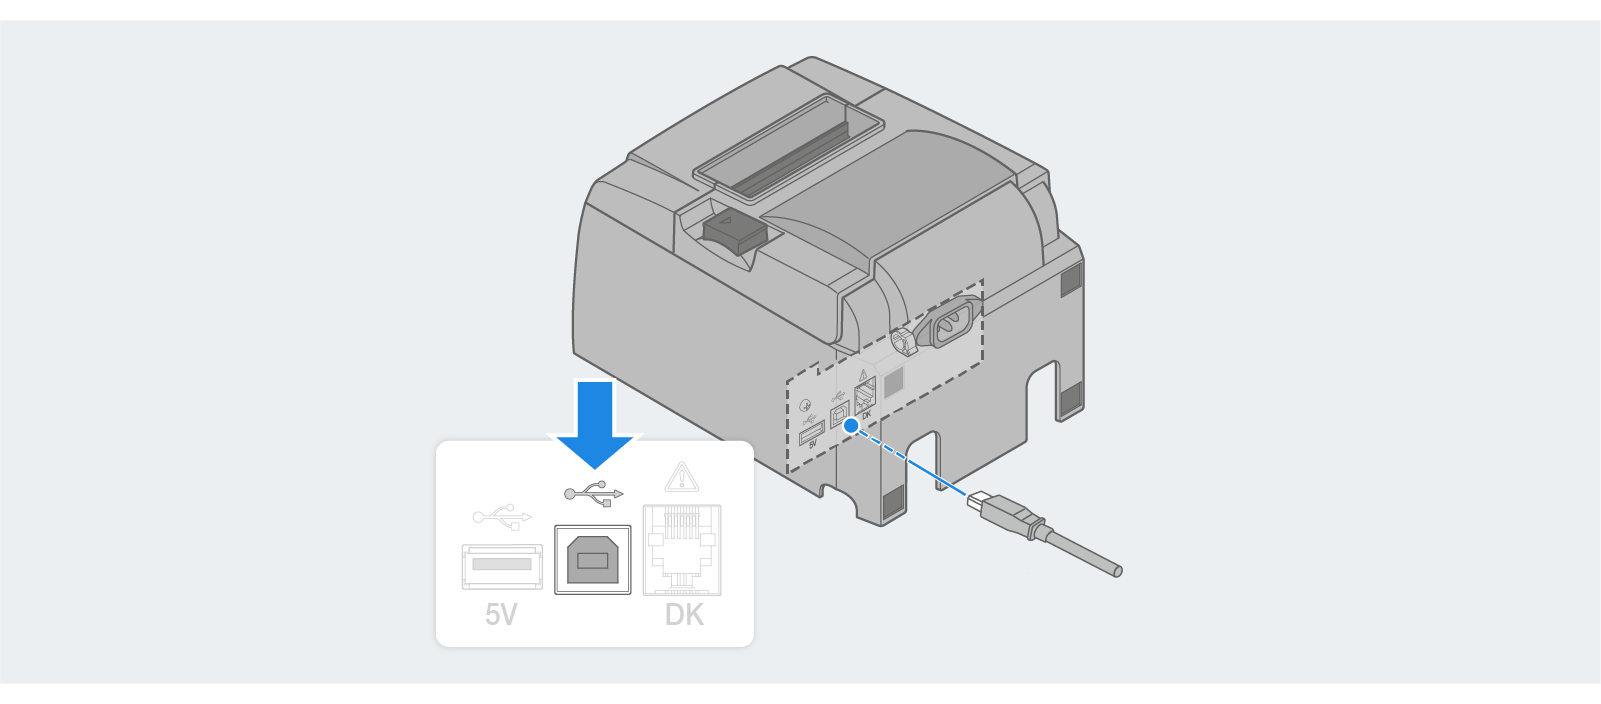
Connect the printer’s USB cord to the USB port in the other port bay.

Secure the cables to the cord hooks with a tie-wrap (encouraged).

Reattach the cover plates. Use the screws provided to secure the cover plates to the back of the display.
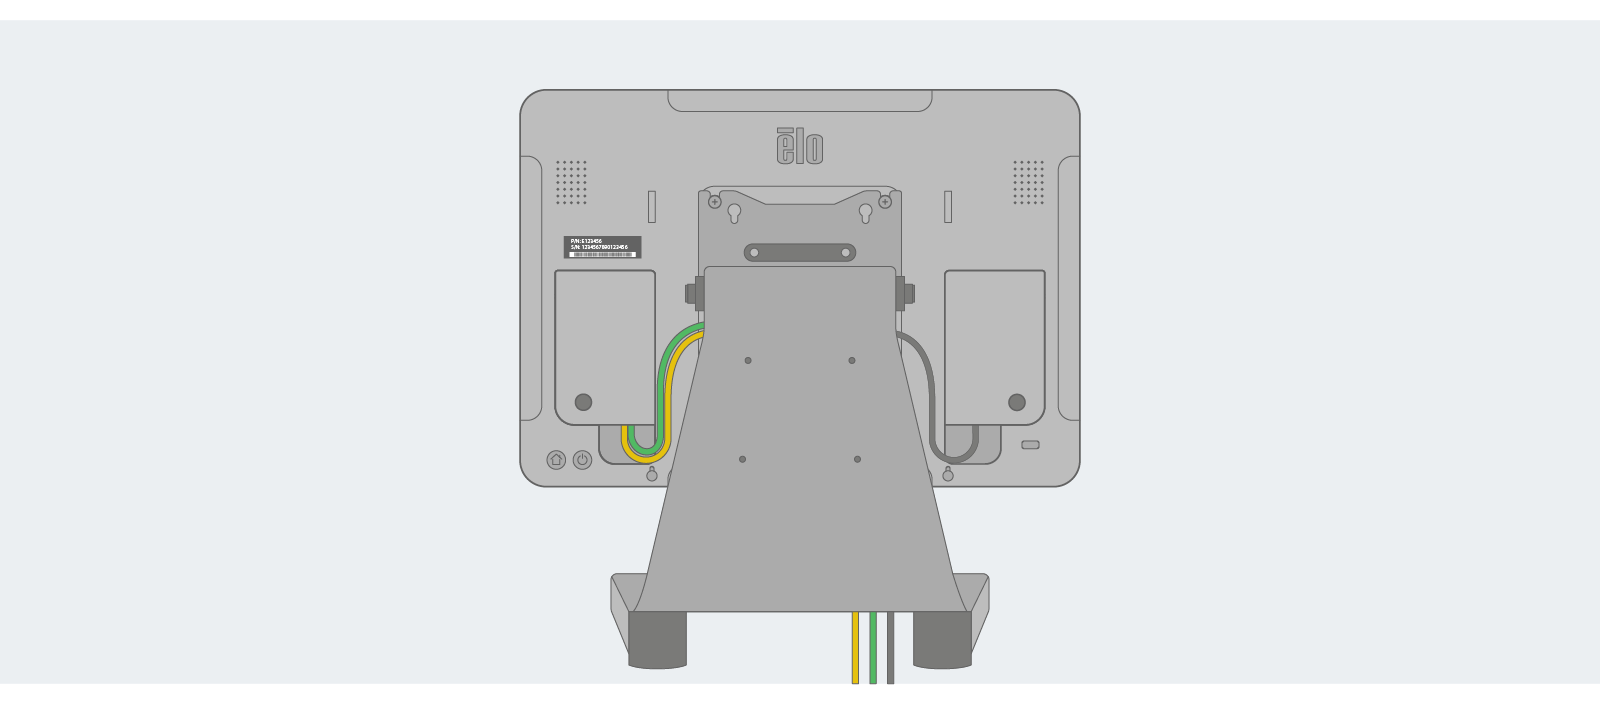
Then, connect the cable to the ethernet port on your router.
Step 2: Set Up the Cash Drawer
The Star cash drawer has a bottom exit cable with the interface port located on the underside of the cash drawer. Begin by flipping the cash drawer upside-down.
Plug the side of the supplied interface cable labeled “cash drawer” into the interface port on the bottom rear of the cash drawer.
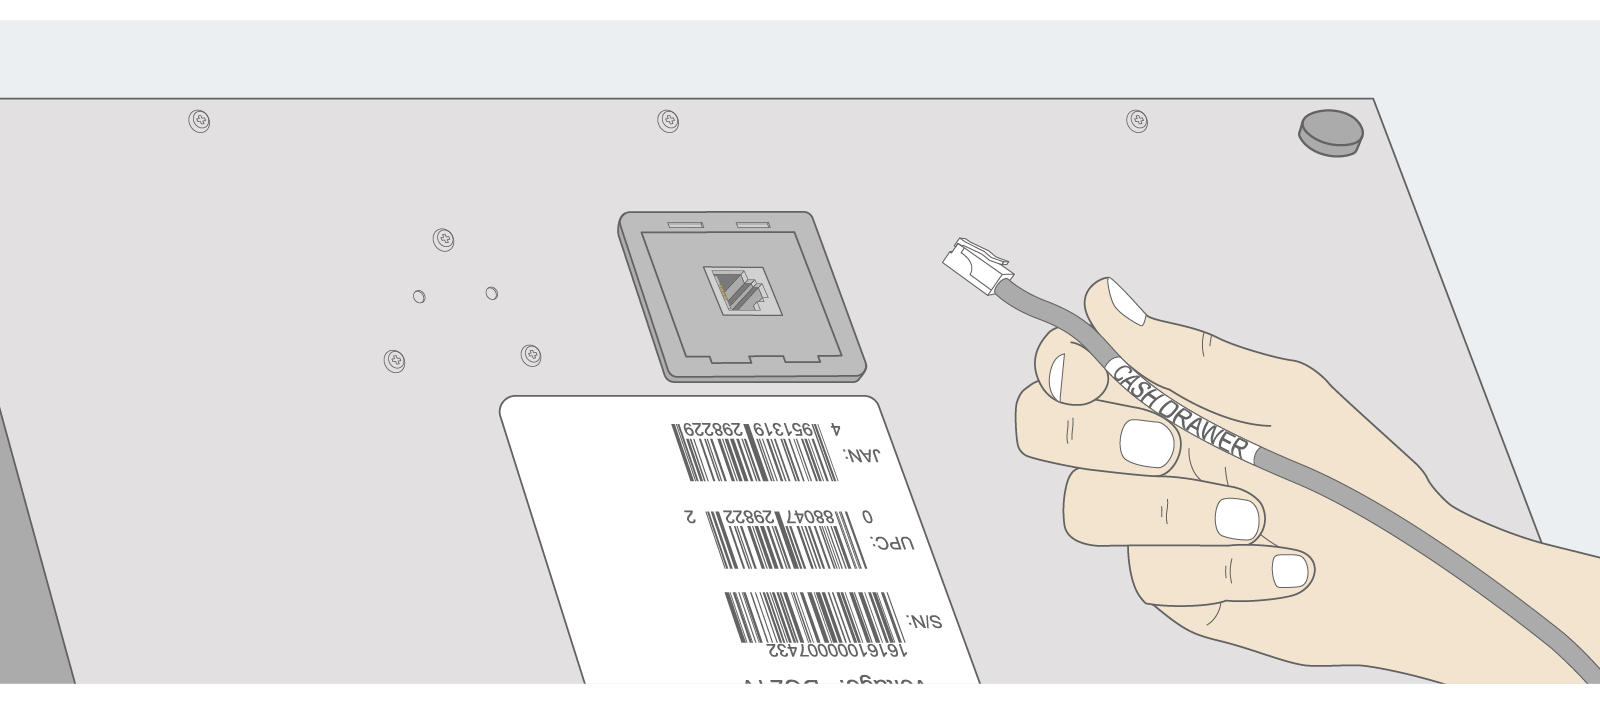
Then, plug the side of the supplied interface cable labeled “printer” into the printer’s peripheral drive connector on the printer's rear panel.
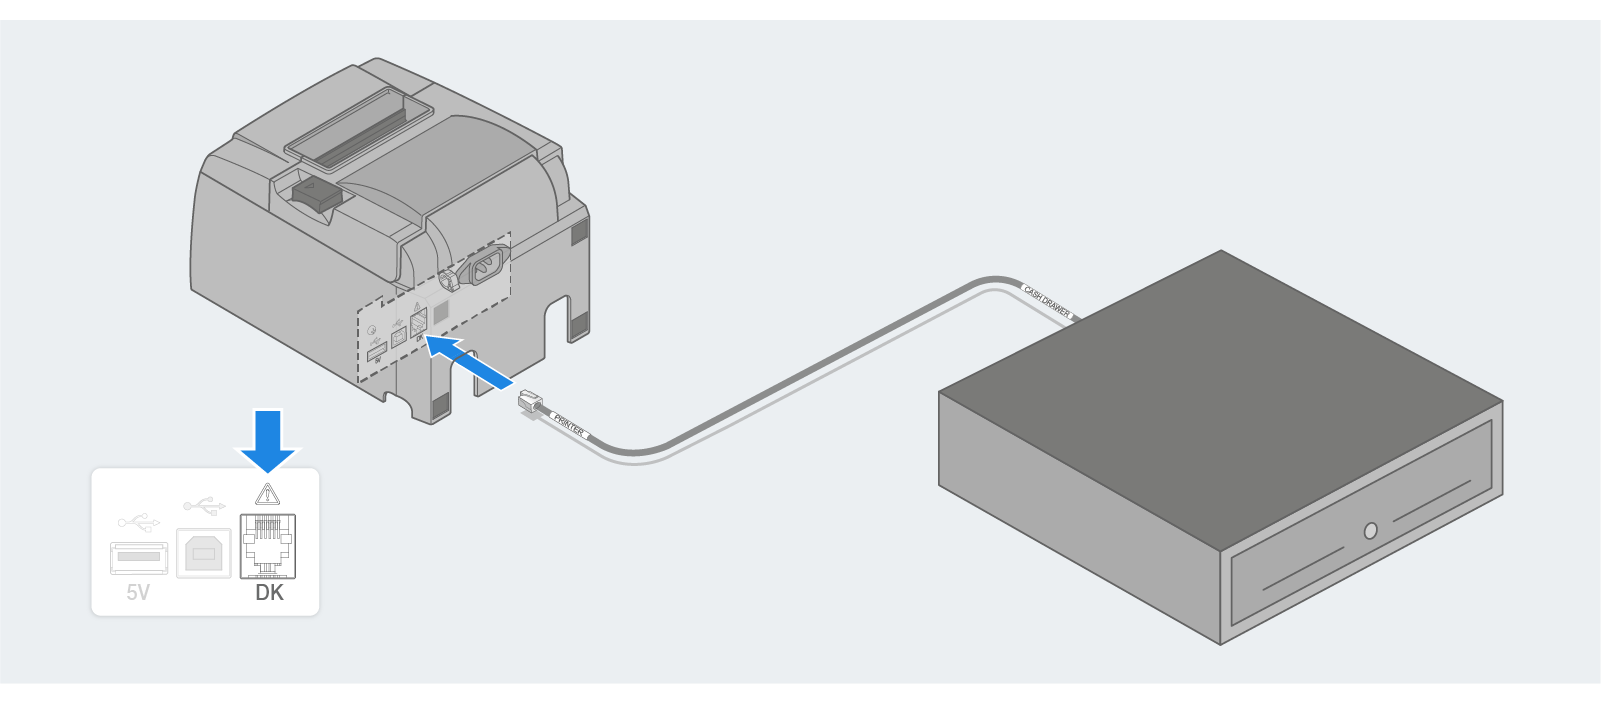
Important: The supplied interface cable is not bi-directional. You must plug the proper side of the cord into the correct device.

Step 3: Set Up the Printer
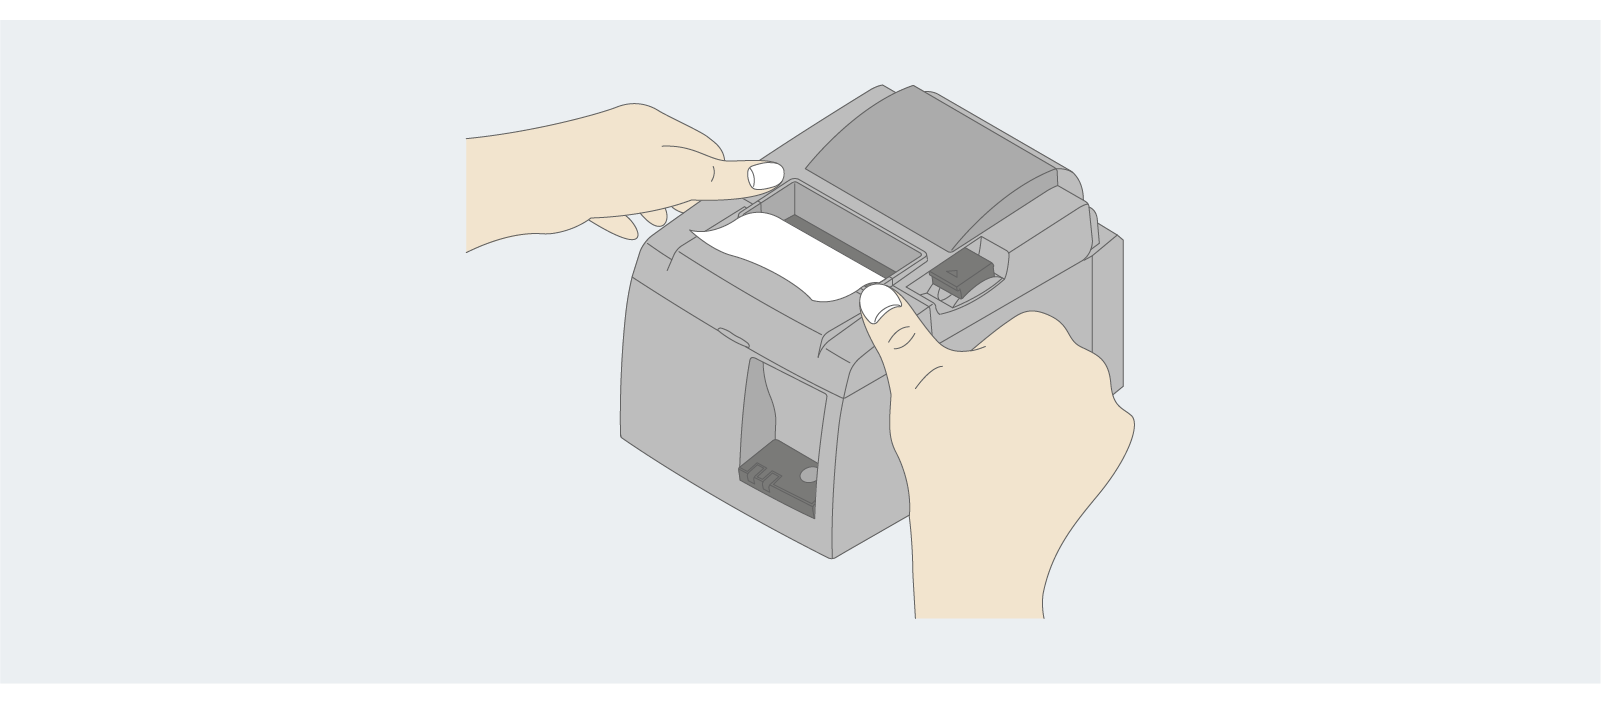
Open the printer cover by pressing the open lever.

Set the receipt paper into the hallow. Note the correct paper orientation from the picture below.
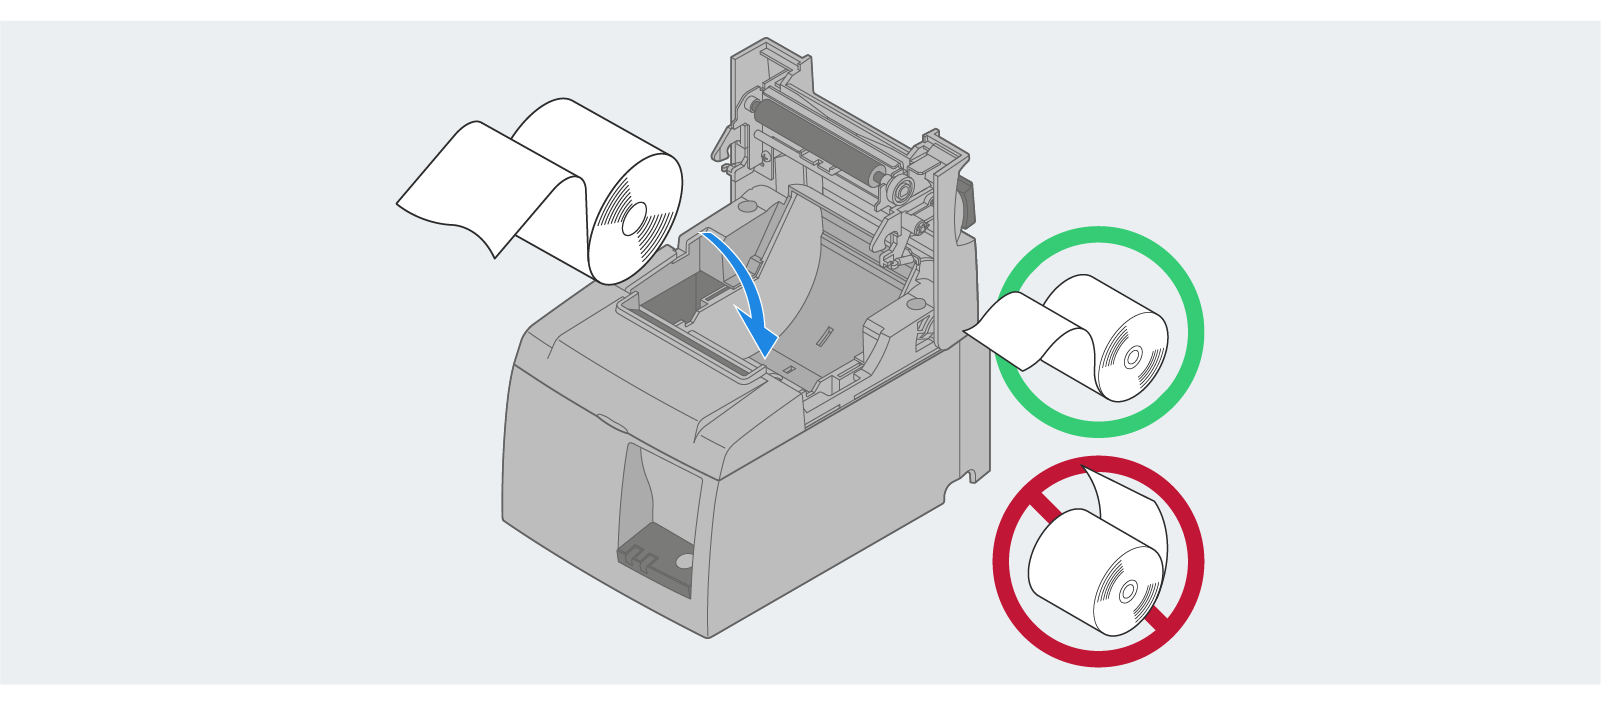
Pull the leading edge of the paper toward you and close the printer cover.
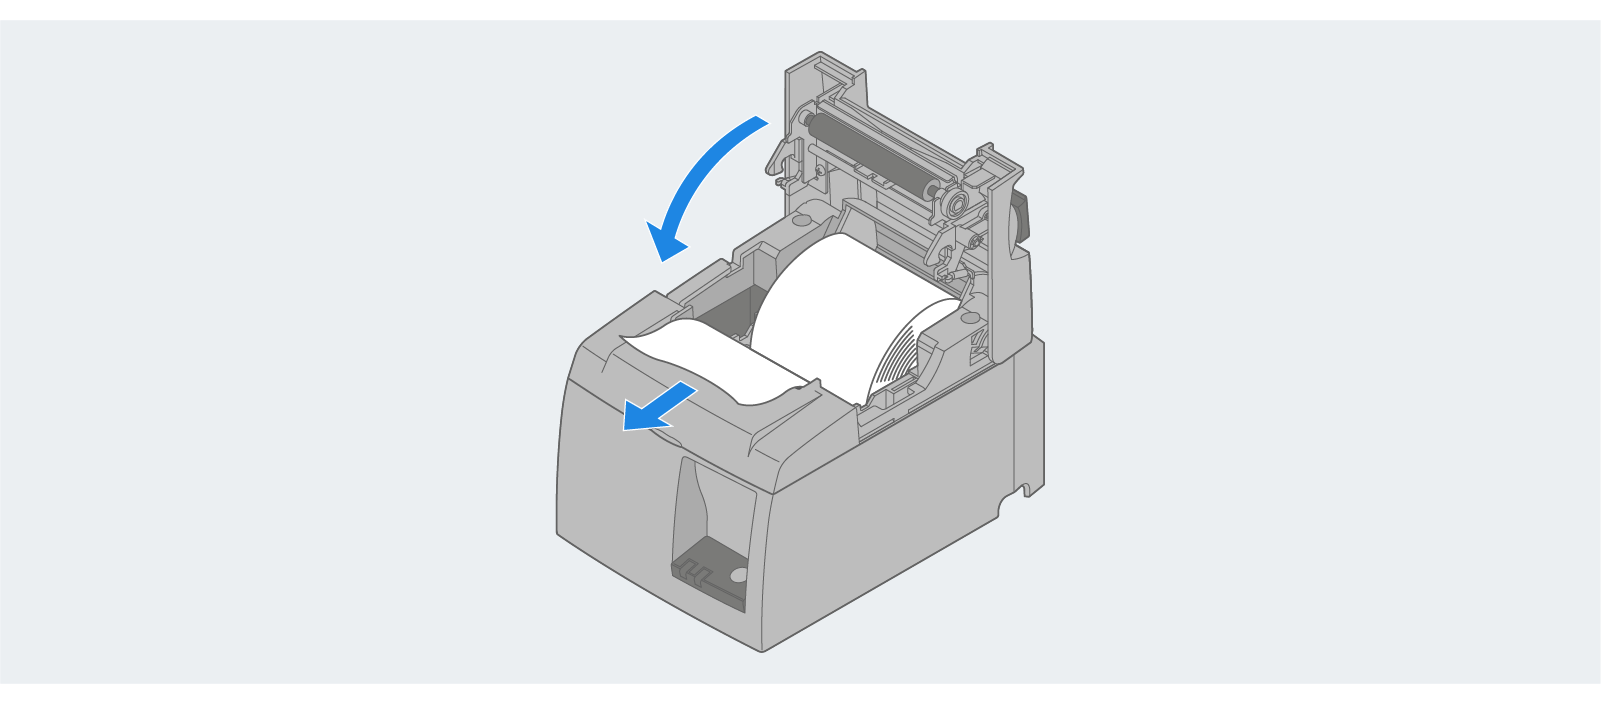
Push down on both sides of the printer cover to secure it.
Connect the USB cable plugged into the display to the port on the printer's rear panel.
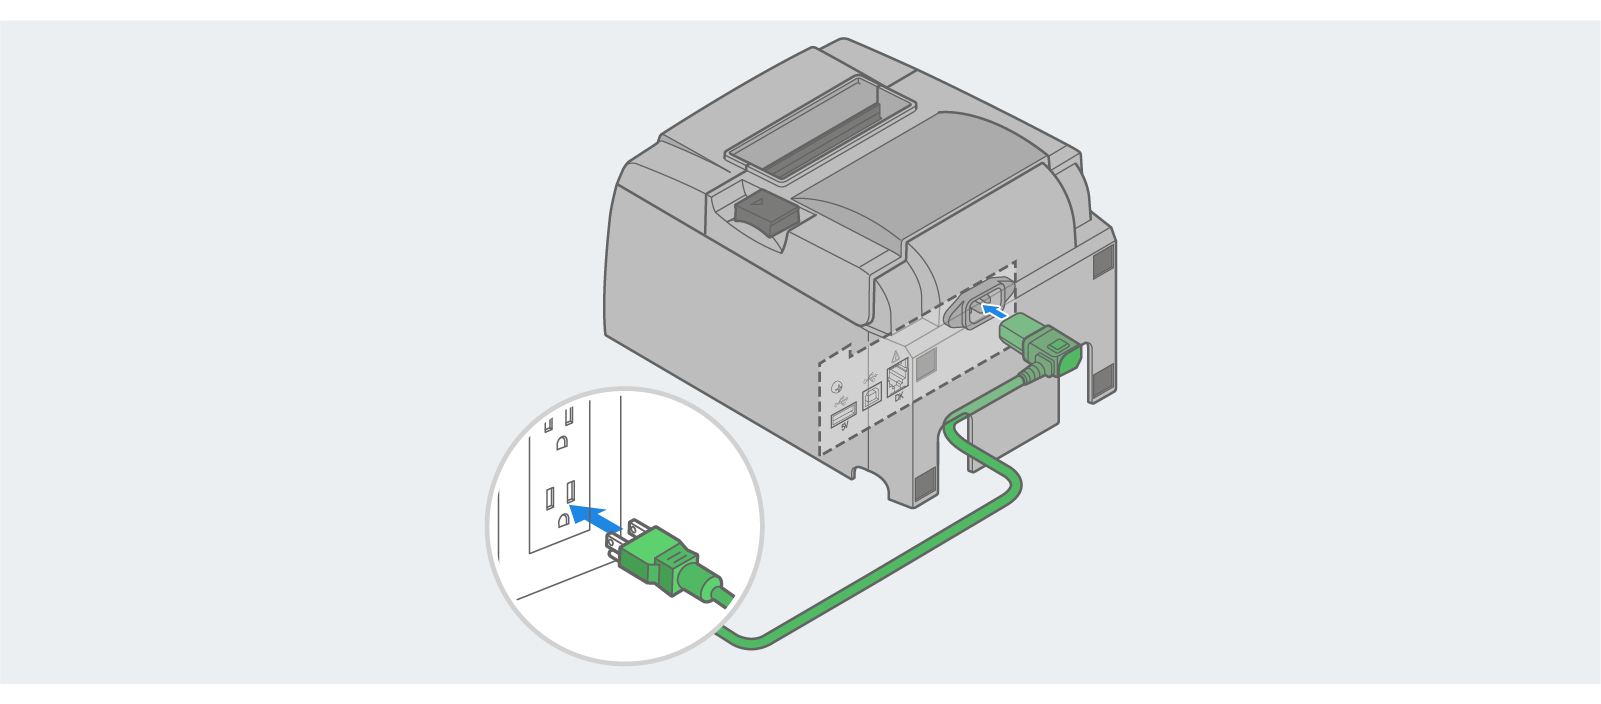
Connect the printer’s power connector to the AC inlet on the back of the printer. Then, plug the power cord into a properly grounded AC outlet.
Step 4: Power On Equipment
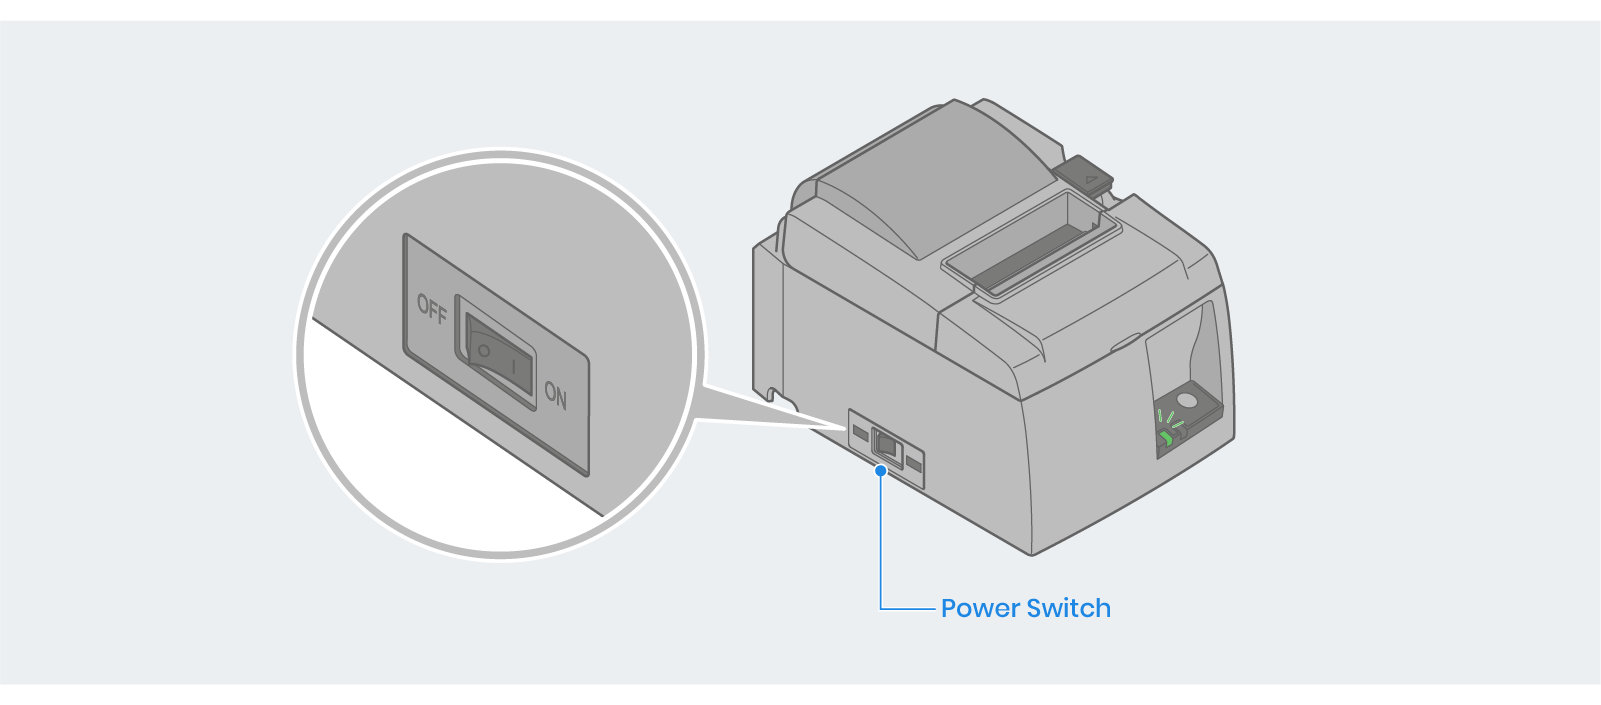
Flip the power switch on the side of the printer to the on position to power up the printer. The power indicator light on the control panel will light up.
Next, plug the power cord from the display into a properly grounded AC outlet. Note that the device will automatically power on once connected.
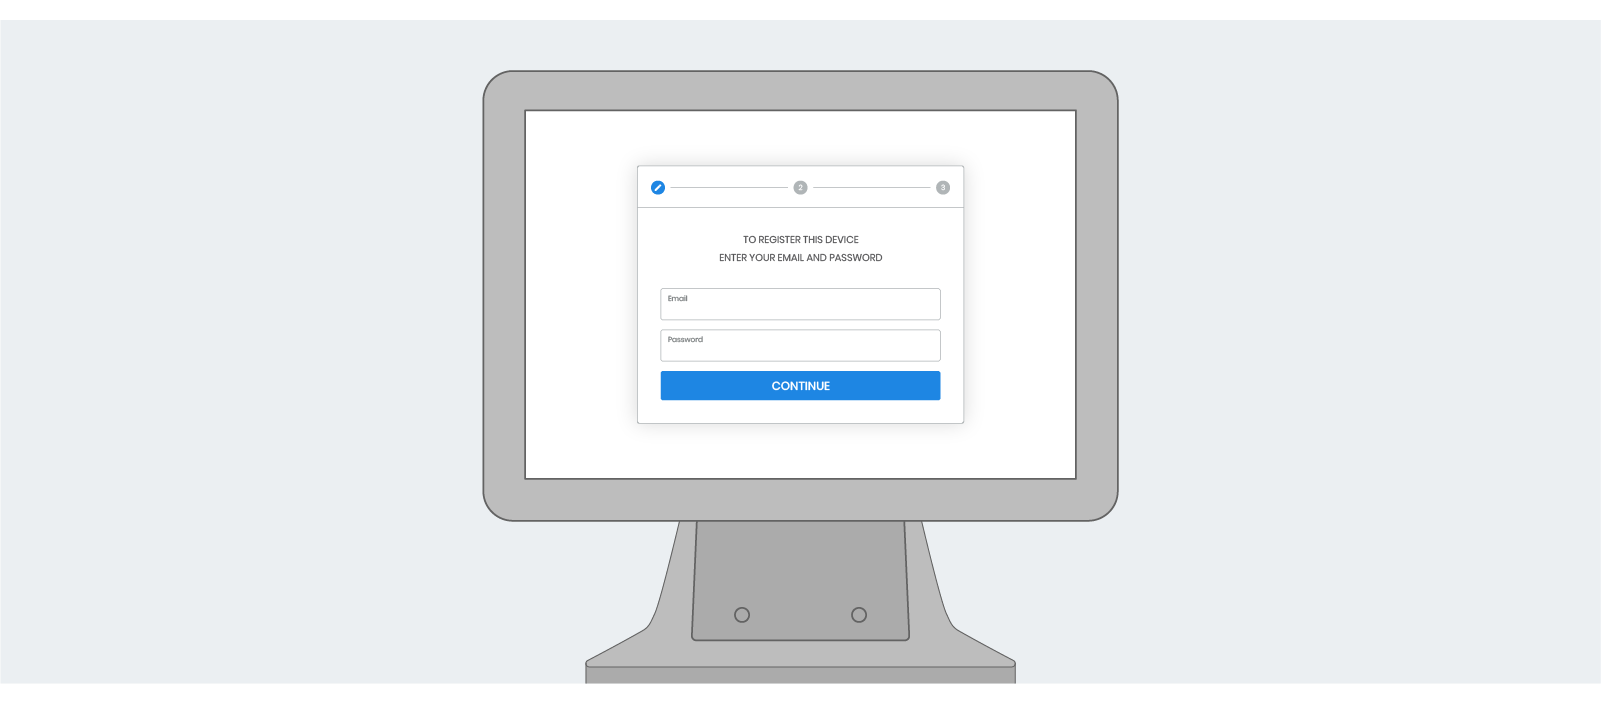
If connected to the Internet via an ethernet cable, the Setup Wizard will automatically appear moments after the device powers up.
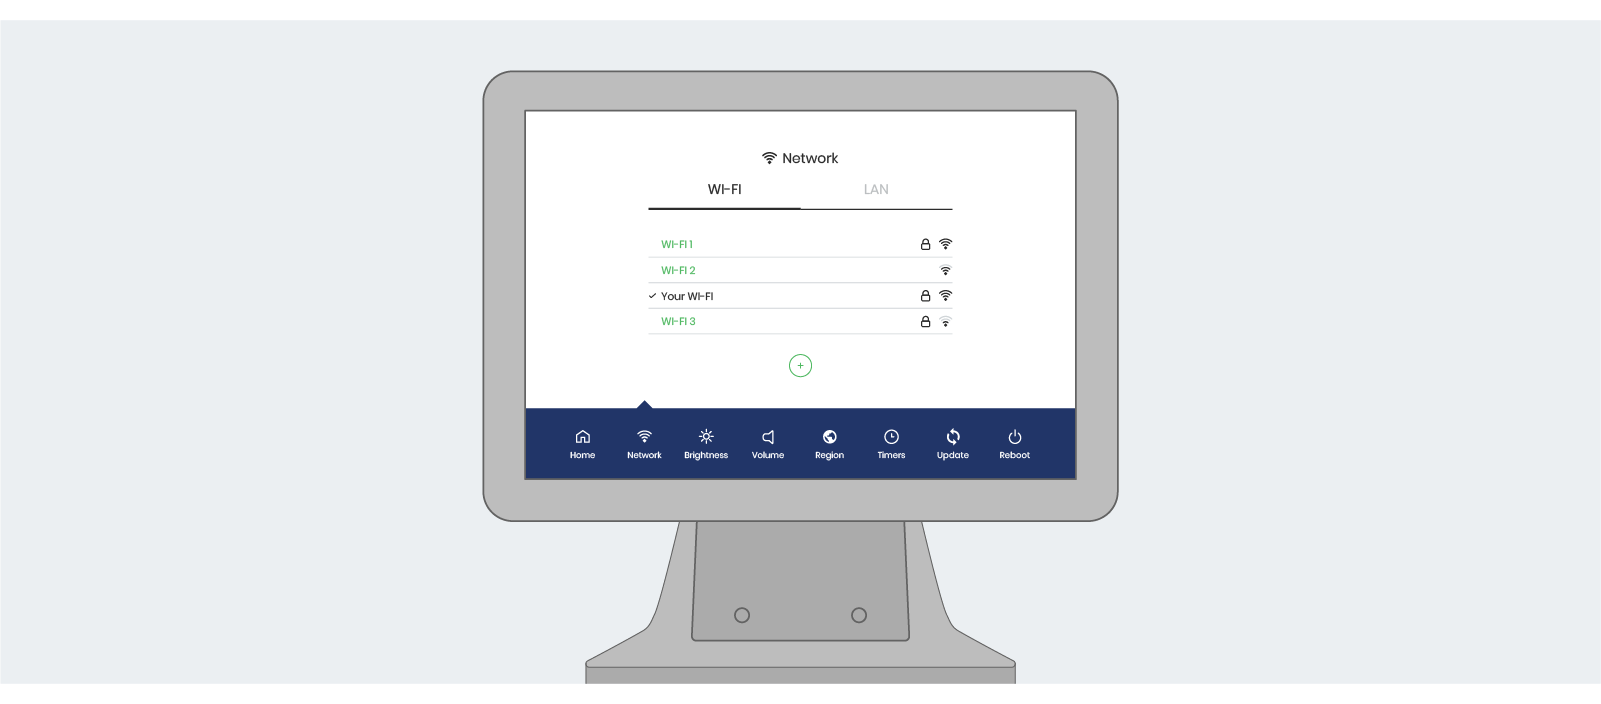
To connect via Wi-Fi:
Press and hold the power button (left) and simultaneously press the home button (right) to enter the Elo control panel.
Enter "1elo" as the password to access the control panel's home screen.
From the home screen, tap Networks and connect to your wireless network. After establishing an Internet connection, the device will automatically reboot, and the Setup Wizard will appear on the screen.