Star Cash Drawer Setup Guide
This article guides you through installing and connecting the Star Cash Drawer to your Star printer.
Written By Mark Hardwick
Last updated Over 1 year ago
Set Up the Cash Drawer
Installing the Star cash drawer is simple, as outlined in the four-step process below. The Star cash drawer should only be used with a certified Star printer. Please reference the Certified Hardware article in the knowledge base for more information on certified hardware.
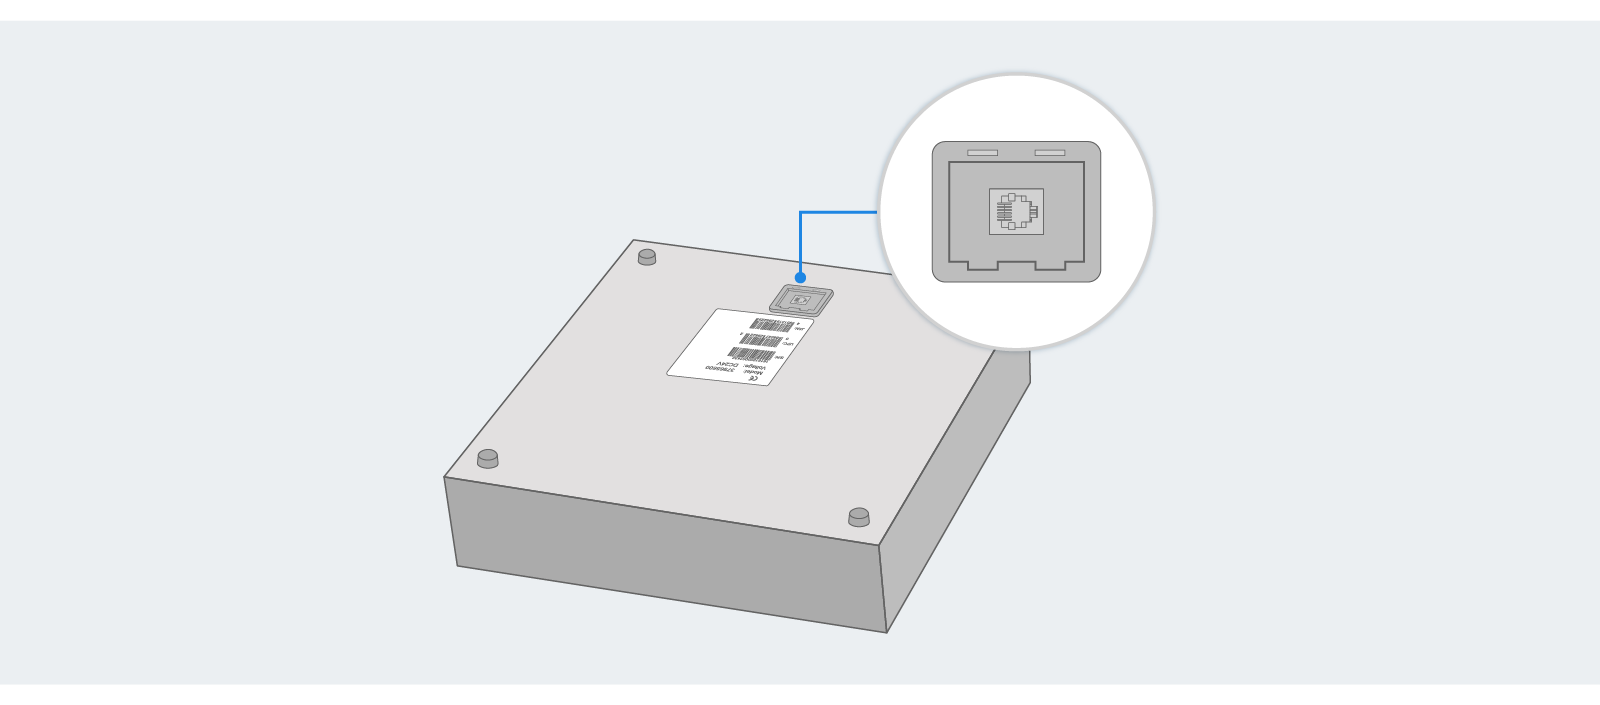
The Star cash drawer has a bottom exit cable with the interface port located on the underside of the cash drawer. Begin by flipping the cash drawer upside-down.
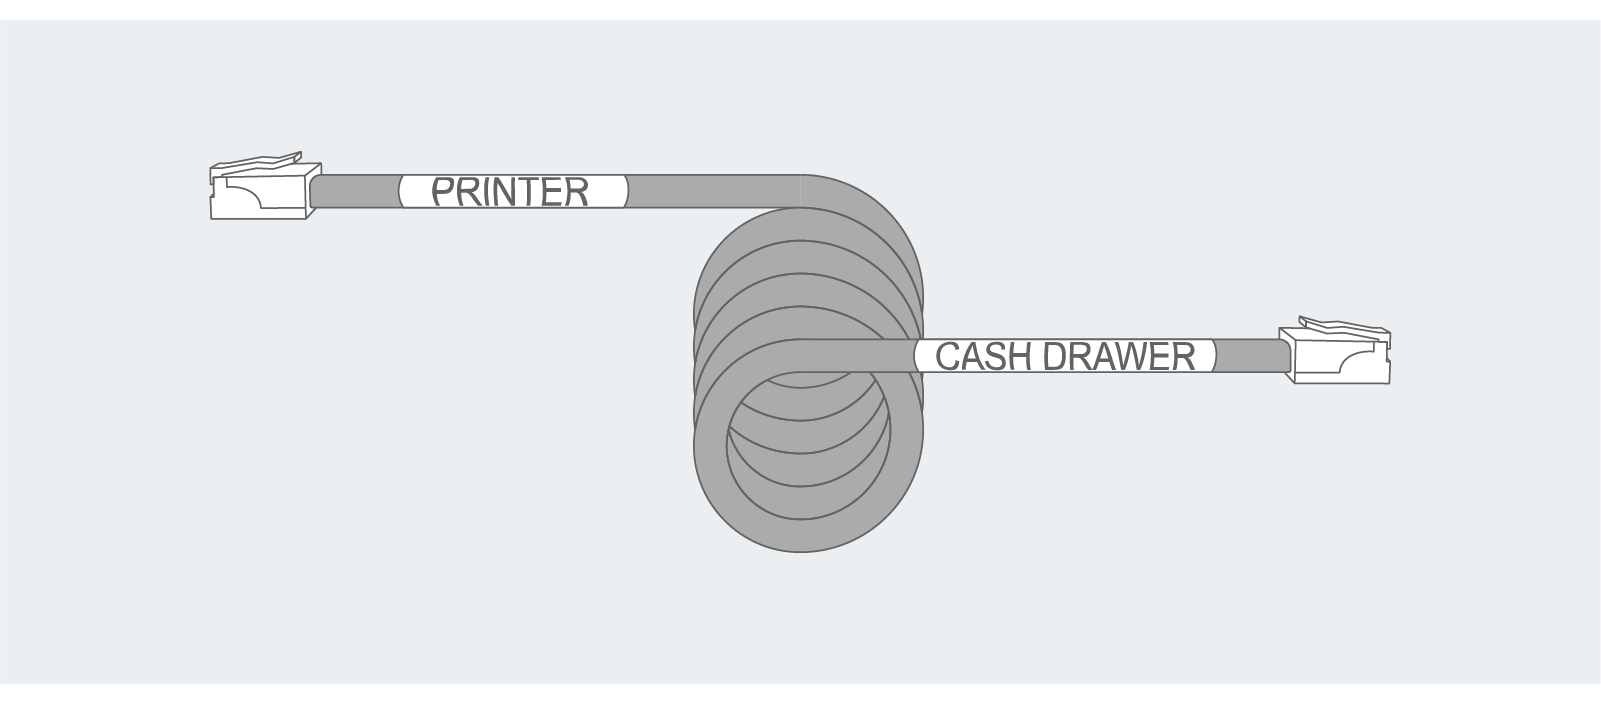
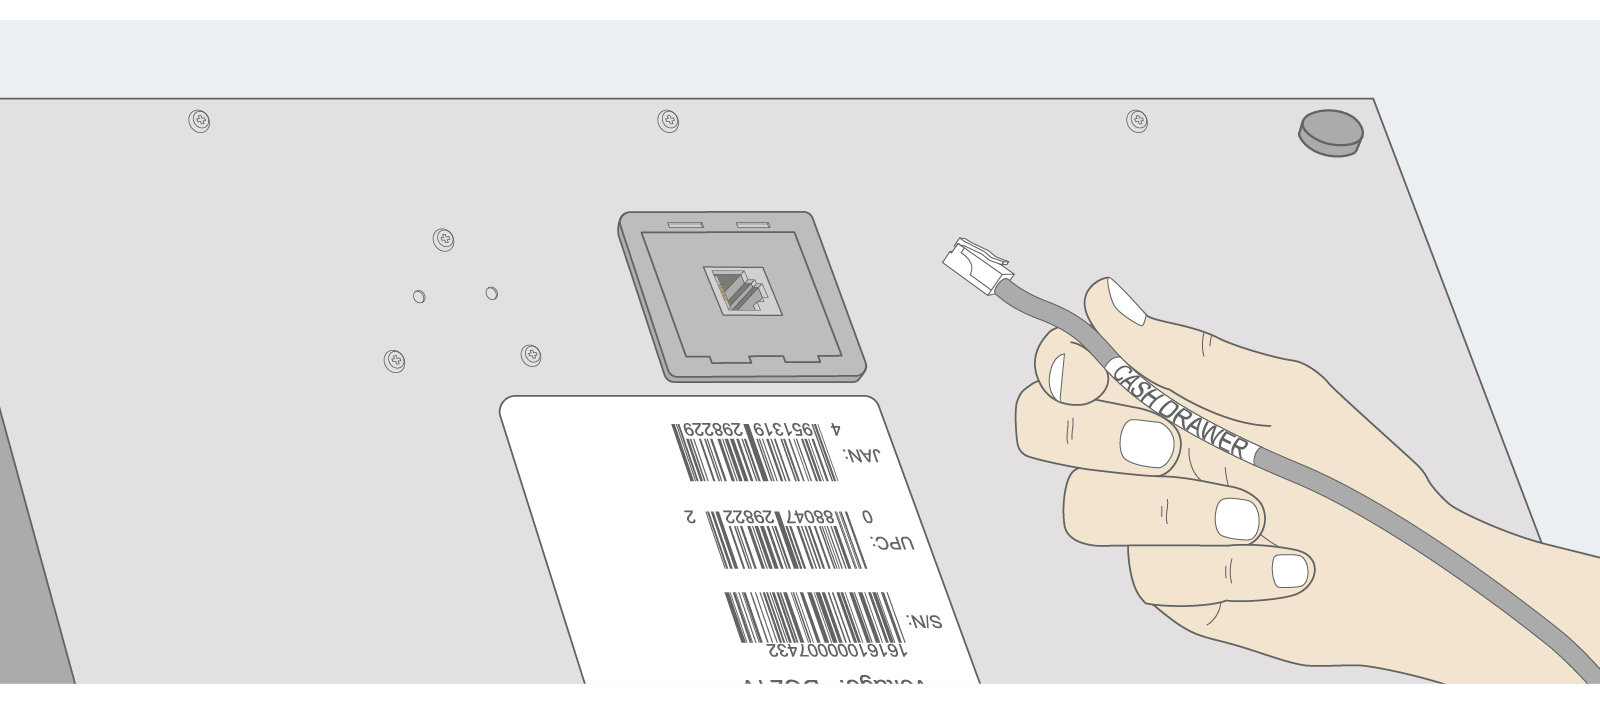
Plug the side of the supplied interface cable labeled “cash drawer” into the interface port on the bottom rear of the cash drawer.
Then, plug the side of the supplied interface cable labeled “printer” into the printer’s peripheral drive connector on the printer's rear panel.
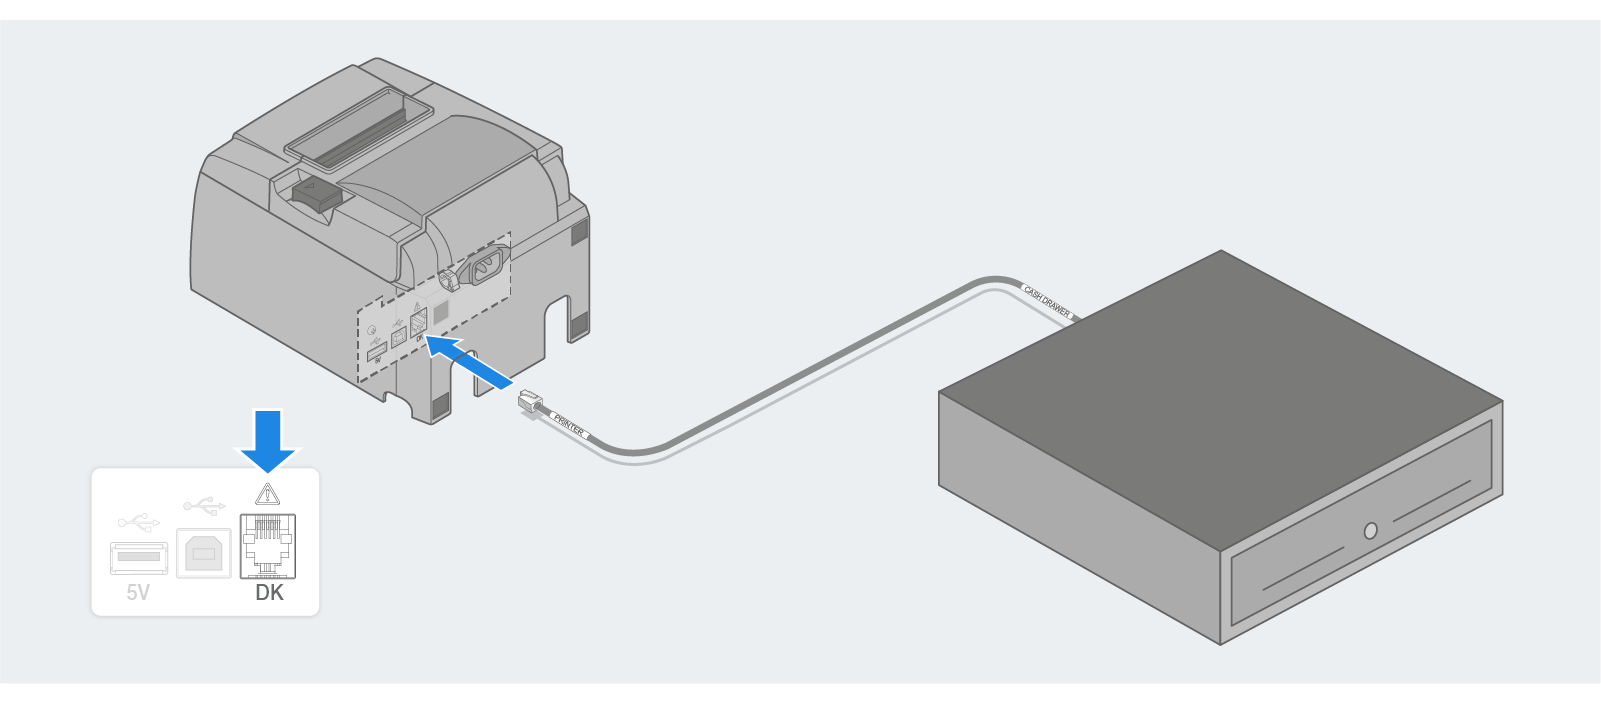
Important: The supplied interface cable is not bi-directional. You must plug the proper side of the cord into the correct device.